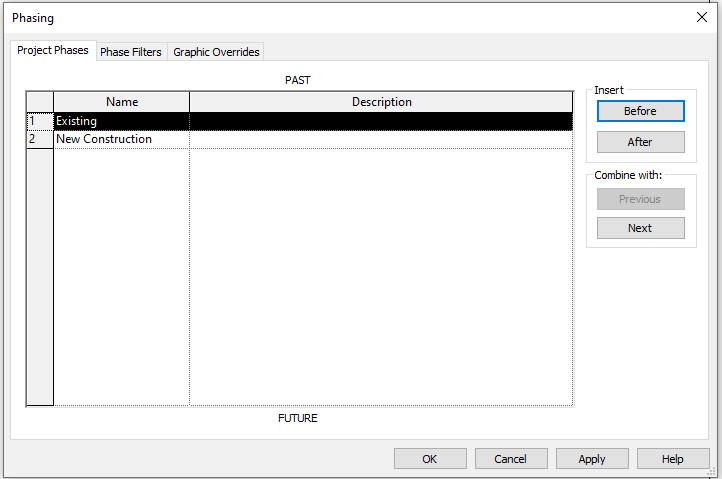
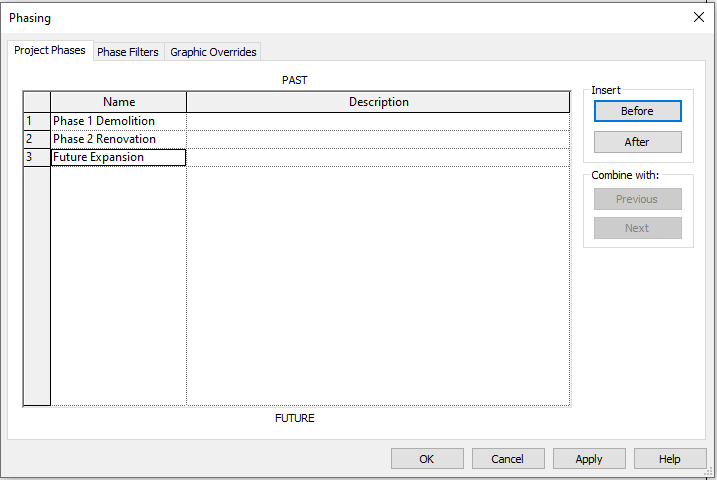
For instance, a wall modeled in the “Existing” phase with no demolition assigned persists throughout the project, while a wall demolished in “Phase 1” disappears in later stages. This system allows you to assign every object in your model—walls, doors, furniture, even annotations—to a specific phase, creating a chronological framework for the design.
The beauty of phasing lies in its flexibility. Imagine a renovation project: you can model the original building in the “Existing” phase, tag walls or windows for demolition in “Phase 1,” and add new elements like modern partitions or HVAC systems in “Phase 2.” Revit automatically tracks these assignments, so when you switch between phases in a view, the model updates to reflect only the elements relevant to that stage. This is especially useful for generating phase-specific drawings—like an “Existing Conditions” plan or a “Demolition Plan”—without needing separate models. It’s a time-saver for coordinating with contractors and stakeholders, ensuring everyone understands what stays, what goes, and what’s coming next.
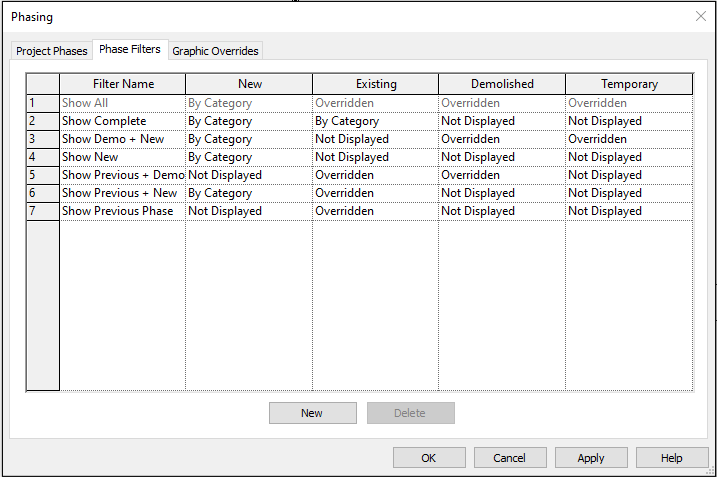
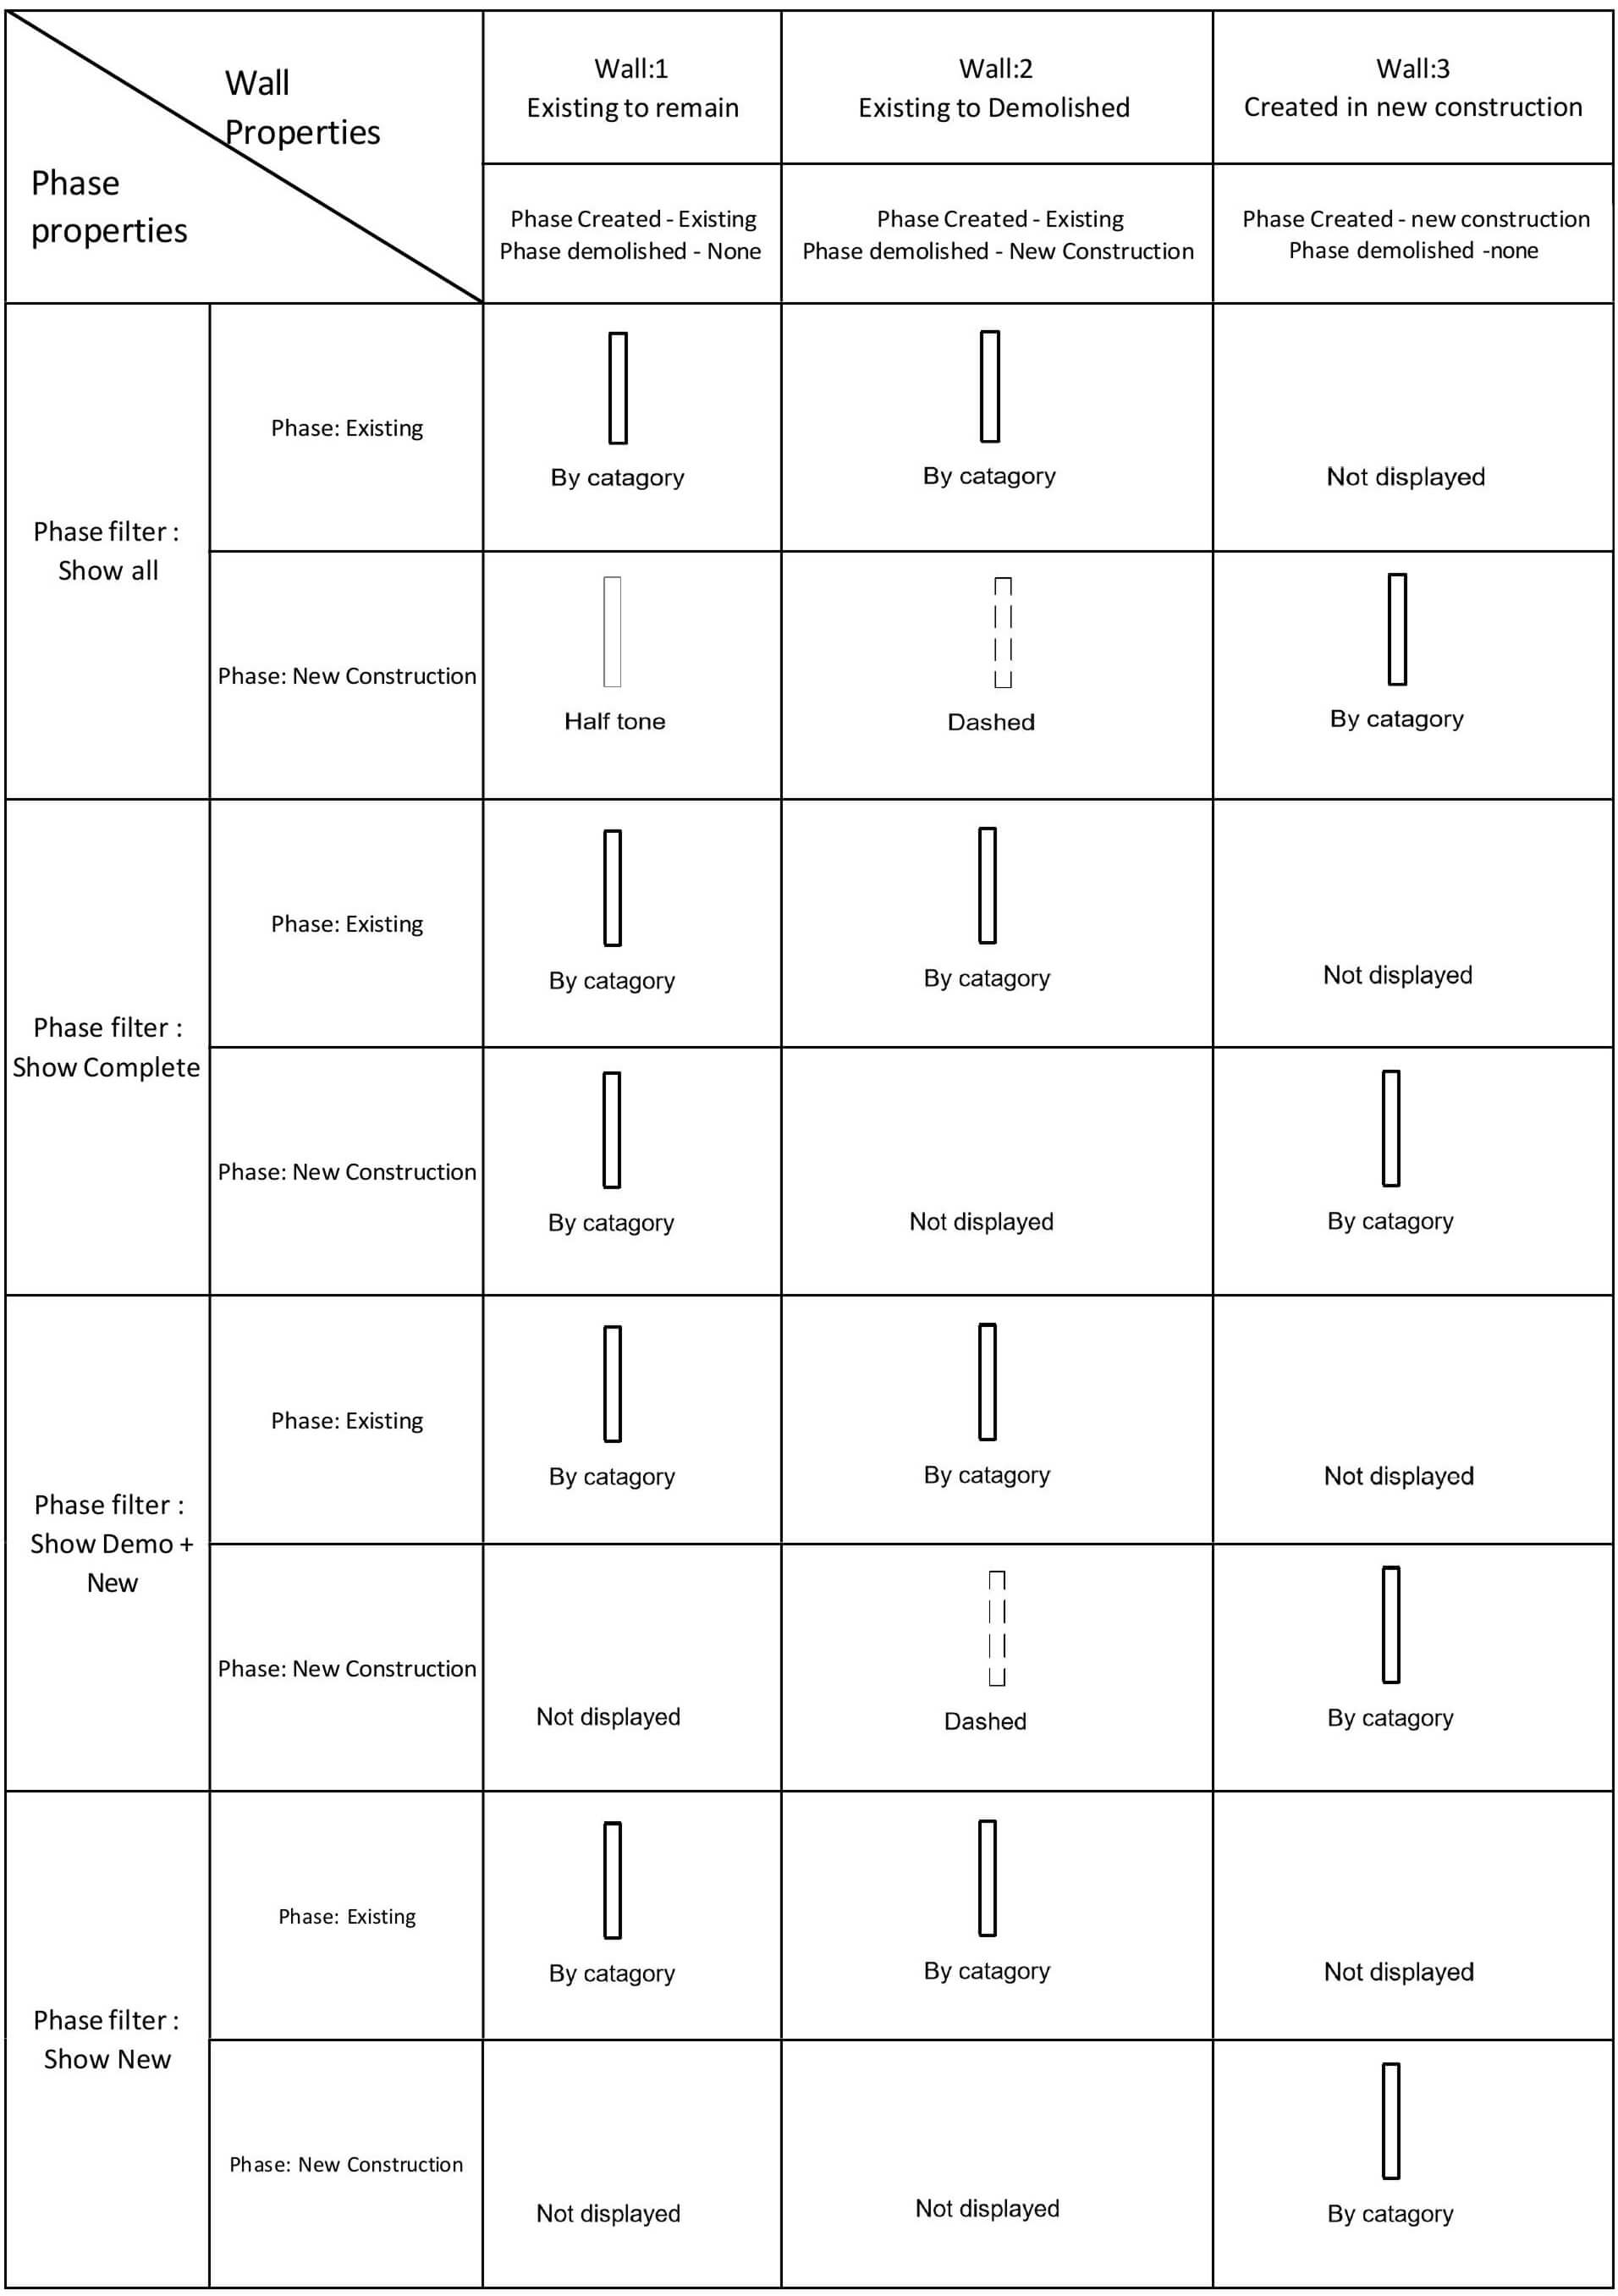
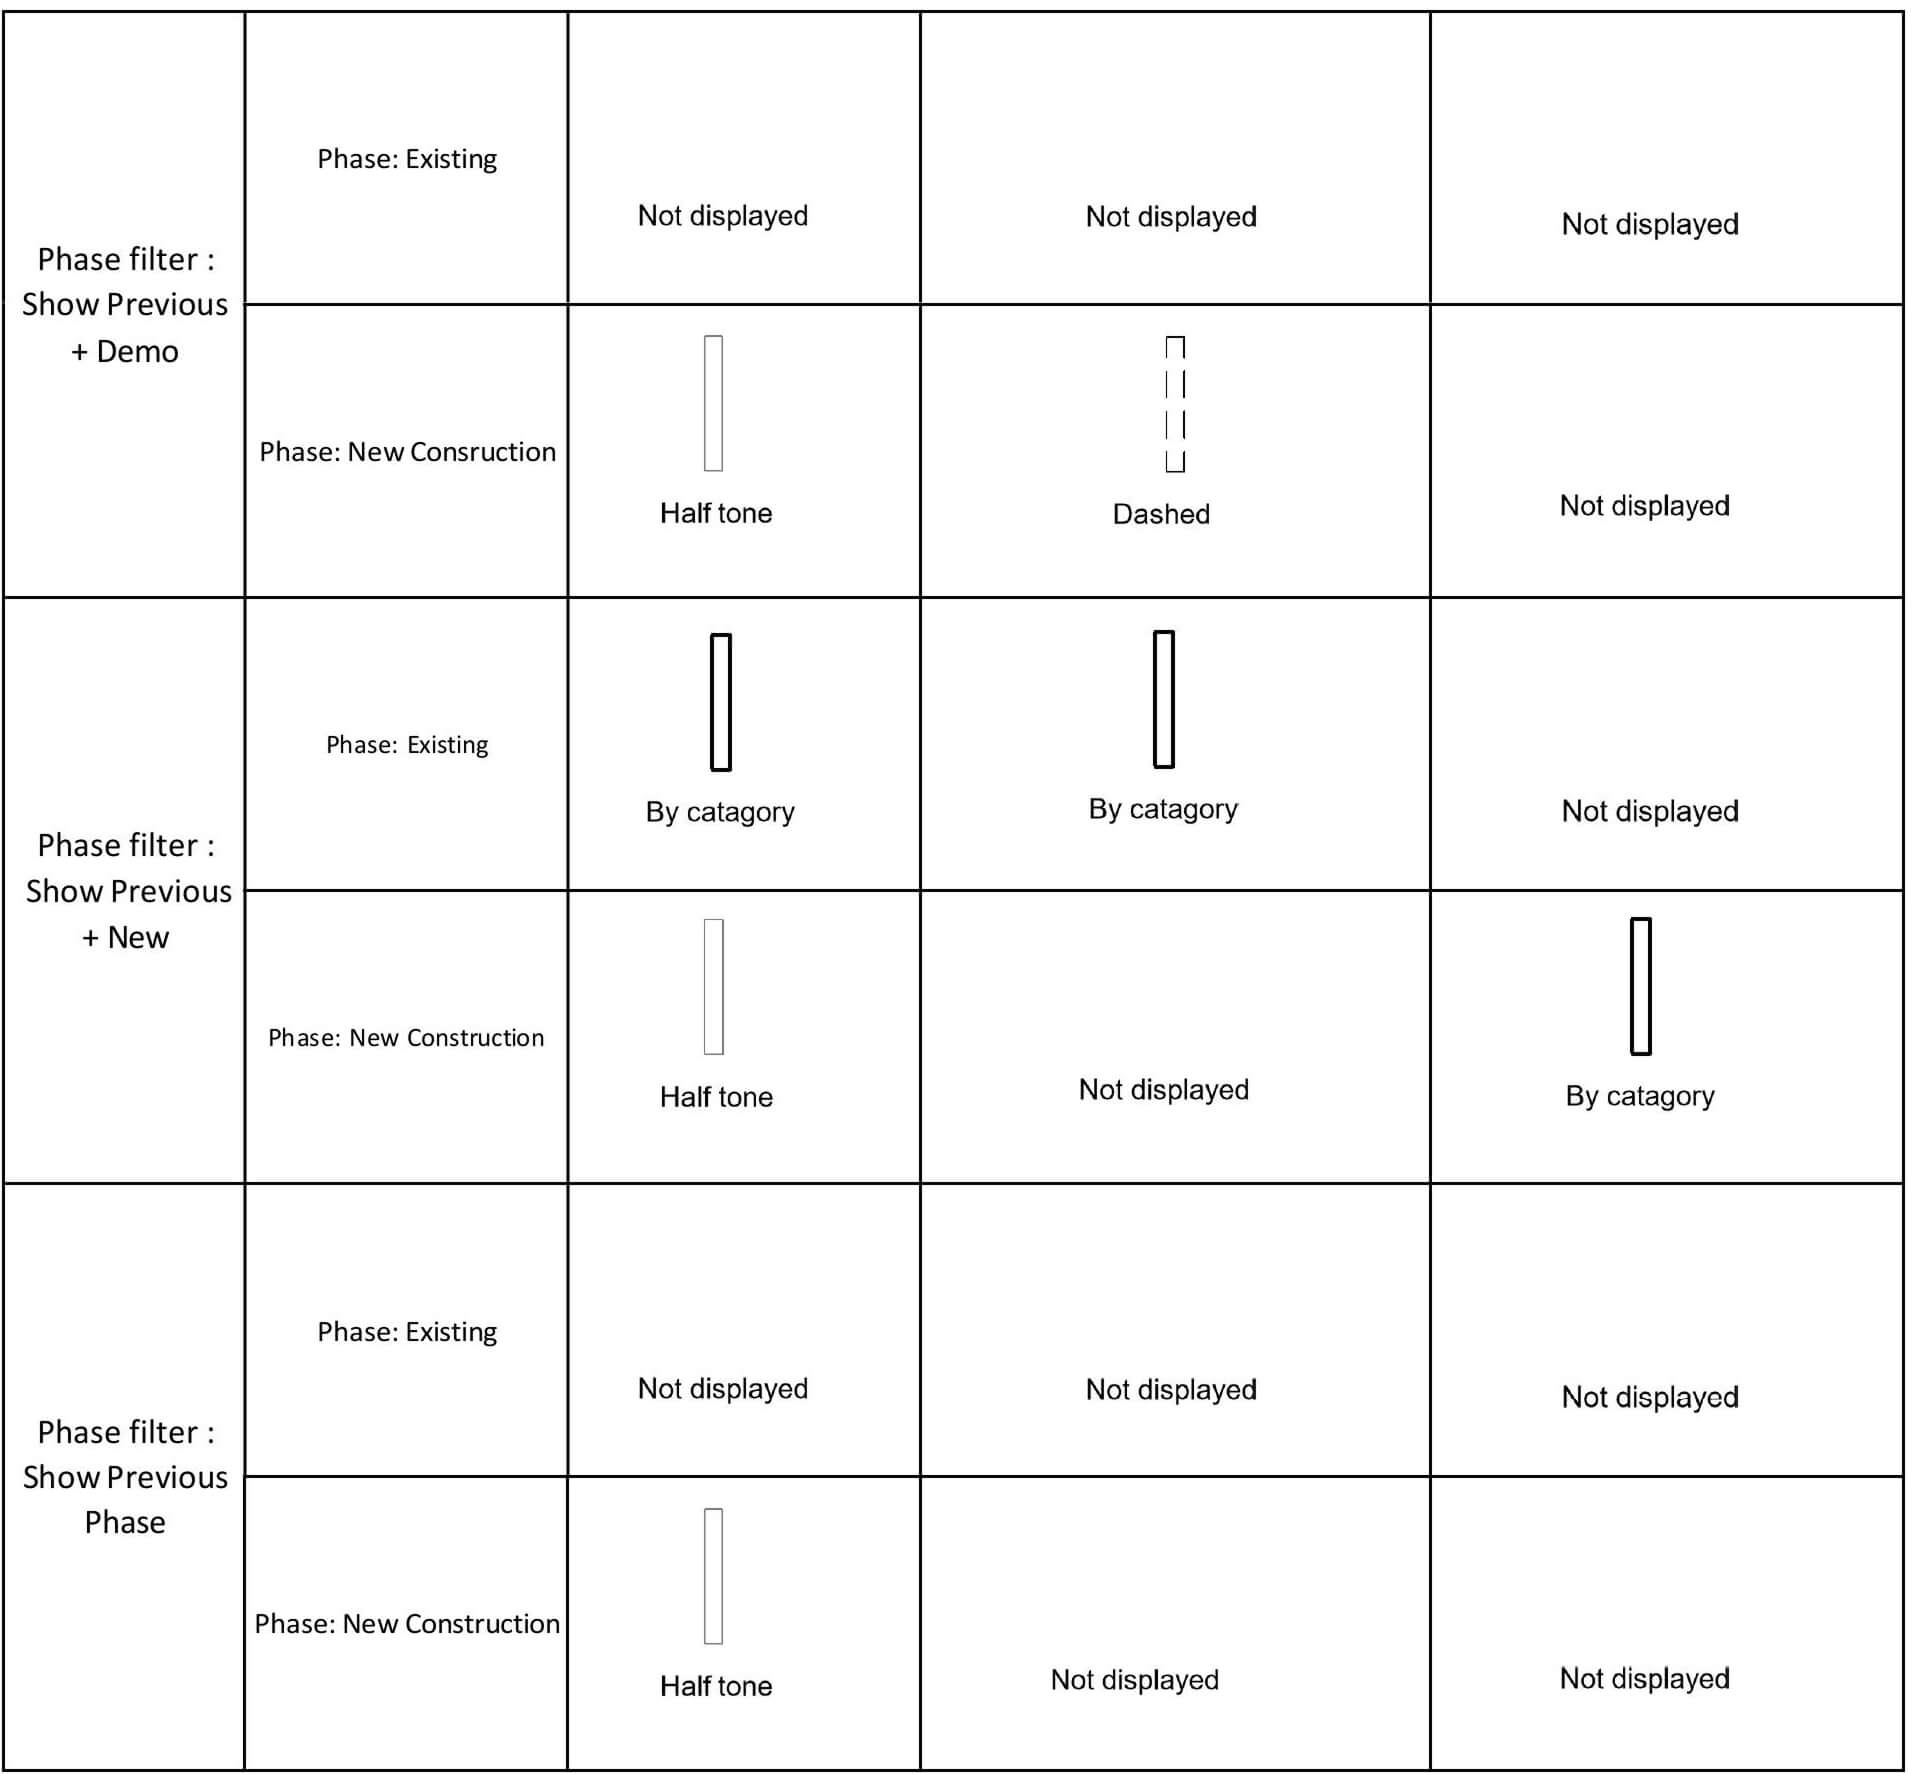
Phase filters work hand-in-hand with phases to control how elements are displayed based on their phase status relative to the view’s active phase. Each view in Revit has a “Phase” setting (e.g., “New Construction”) and a “Phase Filter” setting (e.g., “Show Previous + New”), which together determine what you see.
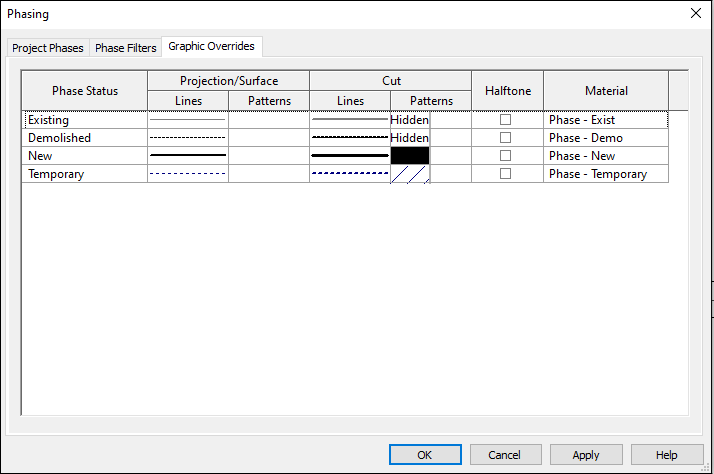
You can customize these filters in the “Phase Filters” tab of the Phasing dialog. For example, you might create a “Show Existing Only” filter to isolate the original building or tweak the “Overridden” settings to change how demolished elements appear (e.g., blue dashed lines instead of red). Graphic overrides, set in the “Phases” dialog under “Graphic Overrides,” let you further refine this—adjusting line weights, colors, or patterns to differentiate phases visually.